Tuesday, December 25, 2012

10 Days of Group Games: #10 Clap Clap Stomp Stomp


The last post of our 10 consecutive days of play ends on a cheery note! 

Just a few weeks back, I joined an amazing nonprofit for a day of spreading joy and laughter to children in Philadelphia who are living in poverty and those without a home. See the video of 500 kiddos dancing along to the Clap Clap Song! It was such a sweet sweet moment and thought it was appropriate to share today!
Try it at home too!
Clap Clap
Stomp Stomp
Turn Around
And, Touch the Ground
Drum on Your Knees

And Jump up Please
Touch Your Feet 
And Take a Seat!

Repeat again and again, each time going a bit faster! 

Play On!
Yvonne ( YoYo)

Sunday, December 23, 2012

10 Days Of Group Games: #9 - Simon Says

Whether or not you're celebrating holidays this time of year, most people are thinking about family right now. And many of us are going to be seeing extended family soon. In that spirit, we thought that it would be fun to post some of our favorite games to play with 2 or more kids that don't require too much adult guidance. Check in over the next 10 days for more fun game ideas!


#9: Simon Says

This is a classic game that's great for any number of kids. It teaches them to listen to each other & play well together. It doesn't take a lot of instruction or direction, so it's also a good way to empower the kids to play on their own and initiate an activity without being instructed by an adult. In case you've been living under  a rock your whole life, here's how you play!


To play the game:

  • One kid will play the part of 'Simon'. The rest of the kids do anything that 'Simon Says' (Simon Says hop on one foot. Simon Says pat your head. Simon Says rub your belly...). But it's 'Simons' job to trick the other kids into following a command without saying 'Simon Says'. If someone does something without the 'Simon Says' command, they're out.
  • Whoever is the last person standing is the next 'Simon'.
  • Remind 'Simon' that there is a big mix in age. So the commands should vary in difficulty. You may be surprised by how well some of the younger ones do with some of the active challenges.
 

Variations:

  • Pick the next 'Simon' from a collection of names put in a hat or a bowl. That way, everyone gets a chance.
  • Get this game moving! Have the group follow 'Simon' through the house or through the yard copying the things that Simon is doing. You could even set up an obstacle course for them to maneuver through.
  • Bring rhythm & music into the mix. Simon can tap a beat on his or her knees or stomp a rhythm on the ground and the others have to try to replicate this pattern. 
  • Simon can use objects or colors to get the group thinking outside the box (i.e. 'Simon says find something green in the room' or 'Simon says find something that starts with the letter T.'). Encourage the older kids to help the younger ones with some of the more difficult commands.

Most of all, have fun! If the kids have a hard time getting the hang of it, encourage them to keep trying until they get it right. Everyone makes mistakes! It's amazing how much kids can learn from their older cousins and friends, so keeping the game going is bound to be rewarding & fun for everyone.

10 Days Of Group Games: #8 Bubble Wrap Pop!


Whether or not you're celebrating holidays this time of year, most people are thinking about family right now. And many of us are going to be seeing extended family soon. In that spirit, we thought that it would be fun to post some of our favorite games to play with 2 or more kids that don't require too much adult guidance. Check in over the next 10 days for more fun game ideas!


#8 Bubble Wrap Pop!
It's that time of the year for lots of cheer and yes, lots of left over bubble wrap.  Last week in our kids fitness classes we pretended to use the bubble wrap as life vest and swam across the ocean wearing them.  Next we spread all the bubble wrap on the floor and pretended to be underwater animals who like to pop the bubbles!    *One quick shout out to our local market, Grapevine, for generously donating a box full of left over bubble wrap for us to reuse in all of our classes! They told me I could be their official bubble lady (I'll be back every month for another box full!).
Pop Away!

Life vest!
High Jumps!


Saturday, December 22, 2012

10 Days of Group Games: #7 the 2 Minute Dance Party


Whether or not you're celebrating holidays this time of year, most people are thinking about family right now. And many of us are going to be seeing extended family soon. In that spirit, we thought that it would be fun to post some of our favorite games to play with 2 or more kids that don't require too much adult guidance. Check in over the next 10 days for more fun game ideas!


#7: the 2 Minute Dance Party!

2 minute dance parties are always a big hit at our house. Is your son in a funk? Throw on some James Brown! Is your daughter bouncing off the walls? Put on some Oingo Boingo! The whole family is just a little off? Nothing that Sly & the Family Stone won't fix. There's something about calling a 2 minute dance party that sets everything right. Because sometimes all of the energy that's flying around the house just needs to be focused instead of quieted down. If you can't beat 'em, join 'em!


Here's what to do:

  • Whenever you need the family (especially the kids) to switch gears, just throw on some of your favorite music and start a dance party! I love '2 minute dance parties' because you can use this activity as a transition. And, depending on how it goes, you can keep dancing until you're worn out, or you can move on to something else once the song is done.
  • Use the opportunity to expose your kids to new music! Try some reggae, some afro-funk, British invasion, punk, classical, doo-wop... anything you'd like! You never know what kind of music is going to speak to a child. How was I to know that Rowan's favorite band would be Siouxie & the Banshees?
  • Use the opportunity to expand their imagination. Ask them what they see when a certain song comes on. Do they see a ballroom of dancing princesses when a baroque waltz is played? Or do they see dinosaurs playing in a jungle when you put on some David Bowie? Are they flying through space when New Order comes onto the stereo?
  • Join in the fun! This is a great way to bond with your family & friends. And it's good for your body and your mind. We could all afford to burn a few extra calories, especially when it's accompanied by laughter & song.
  • Try a 'freeze' dance. You can do this manually (just pause the song periodically) or you can find songs that have built-in 'freezes'. Try this one: http://lollyhopwood.bandcamp.com/track/freeze (shameless plug!). You can make a game out of the 'freeze dance' if the spirit moves you. Anyone who moves when the music is frozen is 'out'. The last one standing wins! Or you can keep it light and just keep the 'freezing' going until the song is done. Try freezing like your favorite animals. Or do a funny-face-freeze. Either way, it's a fun game.
None of us have to be reminded these days that the time that we have with our kids is precious. Hugs & kiss them! Love them! Play & dance with them! We'll all be glad that we did.

Friday, December 21, 2012

10 Days of Group Games: #6 Newspaper Pirate Hats


 Whether or not you're celebrating holidays this time of year, most people are thinking about family right now. And many of us are going to be seeing extended family soon. In that spirit, we thought that it would be fun to post some of our favorite games to play with 2 or more kids that don't require too much adult guidance. Check in over the next 10 days for more fun game ideas!


Game #7: Newspaper Pirate Hat
One of my favorite memories at Christmas dinner was of my grandfather and I wearing homemade paper hats for no reason but to be silly and enjoy the festivities! So, I broke out this tradition in my kids fitness class today and together we created them and danced all around.  We pretended they were our pirate hats, but of course anytime is a good time to make a party hat! 


Quick and Easy Instructions:
1. Find a piece of newspaper (this is the most difficult part b/c for it to fit on a child’s head you want to get a smaller sized paper.  I used the grocery ads that come in the mail.)
2. Fold the paper in half
3. Take the top right and left corner and fold it in towards the middle while leaving 1 – 2 inches of paper below. Press the edges down.
4. Fold the top sheet of the bottom up two times.

5. Flip the paper and repeat.
6.  Either fold the corners over or place a piece of tape on the ends to prevent it from coming undone.

IT'S PARTY TIME!  ~ Yvonne


Thursday, December 20, 2012

10 days of group games: #5 - FORTS!

Whether or not you're celebrating holidays this time of year, most people are thinking about family right now. And many of us are going to be seeing extended family soon. In that spirit, we thought that it would be fun to post some of our favorite games to play with 2 or more kids that don't require too much adult guidance. Check in over the next 10 days for more fun game ideas!


#5. FORTS!


I don't think this one needs much explanation. Nothing sets a child's imagination going like a home-made fort. It's great for one kids or a whole group of them.


Here are some of my suggestions:

  • Use binder clips for a secure hold. They're an easy way to attach sheets and blankets to just about anything.
  • Find something to prop up the center of the fort. This is obviously optional, but a tall chair, a music stand, or a coat rack can make the fort so much bigger. The bigger the fort, the more fun you'll have!
  • Create little cubbies of activity within the fort. The best one that we ever made was attached to Rowan's dollhouse (just in case she wanted to play with dolls) and her bed (which created a great cubby which she could use as a place for her stuffed animals, a lookout, a reading nook, or anything else she could think of.
  • Let there be light! Make sure the kids have flashlights, a safe lamp, or some other light source.
  • If you have a lot of kids around, think about making 2 forts. They can play 2 teamed games and the forts could be the home base for each team. Or each fort could be designed with a certain age group in mind.
  • I know you're going to want to take this project over. This is one of those things that throws you right back into your own childhood and it's easy to want to just make the whole fort yourself. But try to supervise, help & guide your kids rather than take over the whole project.

Happy fort building!

Wednesday, December 19, 2012

10 Days of Games: #4 Ice Cube Melt

Whether or not you're celebrating holidays this time of year, most people are thinking about family right now. And many of us are going to be seeing extended family soon. In that spirit, we thought that it would be fun to post some of our favorite games to play with 2 or more kids that don't require too much adult guidance. Check in over the next 10 days for more fun game ideas!

Game #4:
The Ice Cube Melt is a super simple and silly game and quite apropos for this time of the year too!  Plus, no equipment necessary!

How to play:
1. Start by asking: "What items in our house or outside are cold?"   Examples might be a refrigerator, ice cubes, or snow flakes.  

2. Next, ask the kiddos to pretend to be like a frozen ice cube (they can stand, sit or be in any position they like as long as they are staying completely still). 

3. You (or a family member) get to pretend to be a giant blow dryer and melt just one part of their body.  Do this by saying the body part out loud and exclaim, “Tada, your nose is melted!”  Or pretend to blow hot air to melt them. 

4. Whatever part you melted the child is allowed to move… but nothing else.  Then melt another part and ask them to move just those two areas.  Repeat while giving them a chance to try moving the new areas, until the whole body is melted.  This could take about a minute or as long as you like.  It’s quite silly to see them just move around on one melted foot and arm while still keeping everything else still!

5. Next, have them freeze back up again and try to melt in a different sequence.  The best part is that it can be different every time.

Options: 
A. Have the children decide which body part to melt.
B. Pretend to be frozen with them.  You can take turns calling out a different body part that each of you can now melt.  
C. Pretend to be a dragon blowing a fire breath... or other things that blow hot air!  ;) 

Tuesday, December 18, 2012

10 days of group games: #3 - Scarf toss!

Whether or not you're celebrating holidays this time of year, most people are thinking about family right now. And many of us are going to be seeing extended family soon. In that spirit, we thought that it would be fun to post some of our favorite games to play with 2 or more kids that don't require too much adult guidance. Check in over the next 10 days for more fun game ideas!


#3. Scarf Toss


We play this game at almost all of our shows and it's absolutely one of our favorites. All you need is some light scarves. You can even make them yourself with fabric & scissors.


Here's how you play:  


Set the scene by coming up with some kind of adventure. What are these scarves? Are they birds? Snow flakes? Butterflies? Then you count. One. Two. Three. And toss!  


Variations:

  • Once they're comfortable with tossing & catching, try having the kids catch the scarves on their heads, their noses, their feet, their backs, or anywhere else they can think of.
  • Get the kids to toss it to each other. 
  • Have them throw the scarf in the air, spin, and then catch it behind their backs.
  • The older the kids, the more difficult you can make the game. Can they toss it high up and then run and catch their friends scarf instead?


Once they get the idea, they can play on their own for ages. This game can be blast with brightly colored balloons, too. However you play it, the object is to use your imagination and have lots of fun. Enjoy!

Monday, December 17, 2012

10 days of group games: #2 - A Bucket Of Fun


Whether or not you're celebrating holidays this time of year, most people are thinking about family right now. And many of us are going to be seeing extended family soon. In that spirit, we thought that it would be fun to post some of our favorite games to play with 2 or more kids that don't require too much adult guidance. Check in over the next 10 days for more fun game ideas!


I love playing this simple and easy game in my classroom, because it gives each child an opportunity to have an active role in the games we play.  Cut up a bunch of paper and give a few strips to each person in the family.  Have them write down their favorite active game or draw a picture of what it should look like.  Fun examples could be: pillow fight, tag, hide and seek, sock toss or create a brand new game!  Next, fold it up and place it in a bucket, or another special container.  For little ones you could name it something fun like a jiggle jar, or a treasure chest.   Everyday one person in the family gets to pick out one of the pieces of paper and everyones gets to do the activity together!   

What silly things do you do around the house? 


Friday, December 14, 2012

10 days of group games: #1 - 'Mommy' Race Tag!

Whether or not you're celebrating holidays this time of year, most people are thinking about family right now. And many of us are going to be seeing extended family soon. In that spirit, we thought that it would be fun to post some of our favorite games to play with 2 or more kids that don't require too much adult guidance. Check in over the next 10 days for more fun game ideas!


#1. 'Mommy' Race Tag

I thought up this game over the summer when we were up helping a friend who had a lot on her plate. She has a little girl who is Rowan's age, and all the girl wanted was attention from her mother, which is natural and fine, but became an issue when the mother was fielding important phone calls or dealing with other essential business. This game was a way to turn the little girls' energy towards a positive game that involved the mother, but also gave her enough space so she could do what she needed to do.


Here's how you play:  

You need one adult or older kid to be in charge and a bunch of little kids to play. All of the kids gather at a 'start' place. The person in charge gives them all the 'ready, steady, GO!' and all of the kids run off as fast as they can to find their mother, give her a big hug and kiss, and then race back to the starting place.

Variations:

  • Use this as a way to get kids excited about getting to play with family members that they may not have seen in a long time or may not know very well. Turn it into 'Uncle Greg Tag' or 'Grandma Tag'. 
  • This may also be a fun game that will involve family members who may WANT to play with the kids but have some physical limitations. They can be the ones that the kids race to. Or everyone can 'start' where that adult is stationed.
  • Add obstacles into the mix. Make the kids run around a tree or a chair before they come back to the 'start'. Or have them bring something to the person that they're tagging. A note, a toy, a present...

I was thinking that this would be a good game to play when you have a lot of family around because, although the adults are involved, they are also going to be able to carry on doing whatever they need to do, whether it's catching up with old friends or family, preparing for dinner with guests, or just spending some time relaxing. 

Kids just want to play. It's their life! As well is should be. 
So let's play. 

Thursday, December 13, 2012

Beeswax Candles in Recycled Teacups


During this time of the year, I'm normally crazy busy creating homemade gifts...except this year I wanted to keep it super simple, healthy, and be eco-conscious.  At first I started making ripped T-shirt scarves, which on the  pinterest pictures  looked adorable, but in practice turned into a huge mess of little fabric pieces all on the floor and myself.  So, Plan B was creating candles in recycled teacups.  

I decided to go with beeswax because it's an eco, non-toxic, all natural product with no additives, chemicals, or fillers.  During my research I found out that most manufactured paraffin candles (the kind you find at the dollar store or name brand candle or a craft store) are made of poisonous chemicals.  According to the American EPA, paraffin candles are known to release carcinogens like benzene and toluene.  Often, the candle wicks contain lead, the scents are artificial chemicals, and the paraffin wax is a waste product from the petroleum industry.   A popular alternative are soy candles, but unless they are marked as 100% soy, they also contain the toxic paraffin and are not an eco choice because there is a lot of energy involved to make soy into a soy wax.  

Instructions:
1. Place wick in middle and fill the teacups to the very top with beeswax pellets.  Press them down a lot and fill it up again.  
2. Cut up two strip of card board, staple together and place on top of tea cup, with the wick in the middle. This is to hold the wick in place. 
3. Place in oven at 200 - 250 degrees on a tray that you don't mind getting wax on.  It could take 30 minutes to an hour for the wax to melt. Once melted, adjust the wick and make sure it's in the middle of the cup.  Turn off oven and keep it in over night to prevent the wax from cracking. 
4. I designed my own labels and attached to the cups (see the image below - you are welcome to use it!).  

For the beeswax, I ordered an 8lb organic bag of Beeswax pellets through Amazon for about $70.   I bought natural, lead free wicks on amazon as well.  And all of the teacups, are upcycled from the local Goodwlll and thrift stores.  What a super fun and healthy craft to do with kids, the family or on your own that will brighten anyones day! 

Happiness and health!
Yvonne 


Friday, December 7, 2012

A Little Bit Of Sunshine For a Rainy Day

This is YoYo's Ukelele debut. Well done, YoYo! We hope that you enjoy our little song and that you're all enjoying warmth and happiness despite a little gloom outside.

Tuesday, December 4, 2012

Egg Characters

I can hardly believe that it was a week ago that I was writing about playing in the snow! It's in the low 70's and feels a lot more like spring than early December. But, hey! I've never been one to complain about a beautiful day.
Before Rowan and I hightailed it to the park, we got a little picnic basket together. Picnics gives a normal park visit a little bit of an adventurous feel, so we always bring something along with us. She was happy to pack up some pears and juice, but since it was lunchtime, I wanted to bring something else that would be filling & nutritious. I suggested hard boiled eggs, but she wasn't very enthusiastic at first about that idea. However she changed her mind when I suggested that we decorate the egg shells. All it took was some boiled eggs and some crayons (non-toxic of course). Easy peasy. She loved drawing little faces on them. I made a lizard monster face on one of mine. She asked me to help give hers lipstick.
When we got to the park, she gobbled down our eggs. And she hasn't stopped talking about her Egg Characters all day! What a fun way to get kids excited about eating a healthy, portable snack. Now if I can only figure out how to get her to devour a salad...

Tuesday, November 27, 2012

First Snow!


Although we've had a few flurries around here, I'm calling today the first real snow in our little town.  We all woke up with a little extra energy & excitement.  It's really not even that much snow and it's supposed to turn to the dreaded 'wintery mix' before too long.  So we're off playing right away.  

I've mentioned in previous blogs that I think the first few days of a new season are pretty important. What you do with them can set the tone for the rest of the season. So even if we can't build the epic snow men & snow forts that Rowan has been longing for, we can still have lots of fun in the dusting of snow, making 'animal tracks', mini snowmen, and even having a small scale snowball fight. Little hands don't need very much snow to make a good snowball.

Wishing you many 
safe and playful snow days,
Lolly

Wednesday, October 31, 2012

Trick or Treat & Flying Things!


Last year for Halloween I decided to do something risky.  I wanted to hand out a healthier alternative to candy... something that was more in sync with what I encourage every day to the kids and parents in my classes.  First thought: carrot sticks.   Second thought: my house might get toilet papered.   Final decision: a big bowl full of airplanes, flying disc and toys to play with.  I can't tell you how cool it was to see the kids run back to their parents jumping up and down telling them they got a plane to play with!

Oriental Trading sells a box of 72 Gliders for $12.  Here's the link!
Note: These items worked well for my neighborhood because all the kids are preschool and kindergarten age.  For the older ones, jump ropes, fake tattoos, punching balloons, or kazoos might work too! Now that I have a new nickname with the kids I'm going to have to try Yo-Yo's next year!

Thursday, October 18, 2012

Snack time


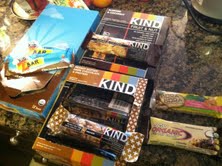
 Finding a healthy snack can sometimes be a challenge, especially on the go, in the car, or after you exercise!  These are a few of my favorite mini meals for on the move that I've shared with my private clients I train. Justin's peanut butter & honey and also Justin's almond butter & chocolate are a delicious protein packed, easy to slurp up, mini treat. Another favorite are the ZBARS (chocolate brownie) made by CLIFF and KIND bars (my favorites are coconut, and the peanut chocolate). Two others are called RAW ORGANIC FOOD BAR (of course... I like the one with the chocolate chips!) and BORA BORA (apricot quinoa).  If you find bars that are USDA organic, then they are also GMO free!  I’m also a big fan of making my own food bars – more details coming soon!  Happy healthy eating!
~ Yvonne

Thursday, September 13, 2012

My very first 5K


Running Color Me Rad
Now that we're seeing the first hints of autumn weather, I am eager to get back into running. Earlier this year, I ran my very first 5k, a huge accomplishment for a girl who always loathed running. To prepare for it, I was trying to get a good run in 4 or 5 days a week and, although I got plenty of support and encouragement from a lot of my friends & family, things were always a little tough when I had to put Rowan in a stroller in order to get that practice run in. I wanted to make her a part of the experience. Kids learn by example, so I knew that by seeing me working towards a goal, she would be getting a great foundation for her in the future. I mean, my mother used to do the Jane Fonda workout when my sister & I were little, and we still view Jane Fonda as the poster woman of beauty and physical fitness. Anyhow, here are a few tips that I found to be helpful in my journey to my first 5k.
  • Get your child excited about your goal. The race that I was practicing for was called Color Me Rad. I showed Rowan pictures of the race that I was going to run. The participants were intermittently sprayed with colors, so it looked joyous and exciting. We would pretend that we were about to get splashed with colors as we were training. It helped her visualize the race. And i think it made her supportive of my goal.
  • Give them something to do. I would often bring books, stickers, toys, or crayons on the run so she would have options. I even found her a cheap MP3 player and she listened to a Curious George audio book while I ran. Scavenger hunts are great, too. I like to run on the Delaware River canal path, so there are always locks and ducks and bridges and herons to look out for.
  • Reward them! This is key. I would often plan my run so we would end up at a park. She knew that she would get some good mom time in at the end of each run & that helped her to allow me the time I needed to get a good run in.  Sometimes we would pack a picnic. Sometimes we would bring a few pieces of chalk. But she knew that if she cooperated, we would be doing something fun for both of us at the end. If you don't have a park that you can run to, try to end at a friends house, a coffee shop, or any other place that will be fun for them. 
  • Let them get out of the stroller.  Rowan has always been an active child. She loves being a part of what's going on. And that was by far my biggest challenge in meeting this goal. Some days it seemed that no matter what I brought to entertain her, we would be 5 minutes into the run and she'd be crying to be let out of the stroller. I learned pretty quickly that sometimes you just have to let her run with you. Sure, she's not going to be able to run as far as I am (although, she's really quick. Sometimes she runs faster than me). But she's learning that running & exercise is fun. 'Race' you child to a tree or a bridge. Or run to each other and see who gets there faster. These little breaks in your routine can be rejuvenating. They can make you more ready & eager for your run the next day. And they'll definitely strengthen the bond between you and your child. After all, the family who plays together stays together.
  • Dress them up. Rowan always saw me getting my special running outfit on. So she'd want to get dressed up, too. Her outfit usually involved some necklaces and a sparkly shirts (I've included a picture of my 'personal trainer'). But getting her in the mood for a run always helped things.
  • Me, my friend Mary, and Rowan post race
    Rowan's Running Outfit
    Fast Little Feet
  • Bring them to your race! Rowan waited for me with her father at the finish line. I grabbed her right at the end and she finished the race with me. But as I was running, I saw whole families racing together. Some kids were in strollers. Some kids were walking. Next year, I'll run the whole thing with her one way or another. But even so, I'm glad that she was there at the end. And I know she was, too.
These ideas might not be revolutionary, but, from one parent to another, they helped me reach my goal & draw closer to my little girl. And I enjoyed every minute of it. 
Happy running!

Tuesday, September 4, 2012

Water Games

Today was back to school for most kiddos in our area but it was still a hot and muggy one.  Check out these six water games that we played this summer... there's still lots of time to cool off!  There is a fun take on the traditional duck duck goose called drip drip splash, along with fire and ice tag, water balloon sheet toss and regular toss and a water gun game called Mr. Fish Mr. Fish What Time Is It?

Friday, August 31, 2012

Sand Castles

As summer winds down, some of us are heading to the shore to squeeze in a few last days at the beach. There  is something magical about the ocean. It inspires your imagination, incites you to play, and sets you at ease all in one fell swoop. One of our favorite things to do at the beach is to build sand castles. And when we build sand castles, we like to make them BIG.  After building one castle that Rowan could use for her dolls, she tried to climb in and use it herself. I thought to myself 'Self, what prevents me from making a sand castle so big that she can play in it, too?' And, from that day forth, we've made it a goal to out-do ourselves in the sand castle building department. 

The most functional interactive sandcastle design that we've come across is to dig down into the sand (as opposed to focusing on building up) and create a bit of a bridge for Rowan to crawl under. This method creates two "rooms" on either side of the bridge that, if you make them wide enough, can be pretty great little hang-outs on their own. I don't think that you can see them very well in the pictures below, but we built small sand shelves, stairs and stools in each of the "rooms". One particular set of stairs collapsed, but we just turned them into a slide instead. The bridges themselves collapse from time to time, too.  Whenever that happened to us, we would just turn each side of the bridge into a mountain, which I think Rowan liked just as much.

Rowan loved decorating  the castle walls with little spires made out of drippy, muddy sand. We mix equal parts sand and water and drip the mud in little piles any place that needs a little decorating. We also enjoyed finding sea shells to adorn our fortresses. And, once in a while, we'd find a little crab and let him frolic in our castle. 

Before you go off an try this yourself, here are a couple of pieces of advice. First of all, make sure to always keep an eye on your little one in the sand castle. It is sand, of course, and anything you build out of it will be temporary by nature. So make sure that you're with them all of the time (naturally). Second of all, it's easy to get wrapped up in your project. I mean, who doesn't feel like they're a kid again when they're playing in the sand? So enjoy! But make sure that they're having fun, too.

Tuesday, August 28, 2012

Shake Your Silly Illy Willies!


We all get the case of the sillies from time to time and we were inspired by the children around us to shake those crazy silly illy willies out from our feet to our head.  Go on... we know you want to give it a try!

Big hugs and thanks to all the kiddos for their playful and sweet hearts who made this video such a blast to make, and to Scout for a fabulous production.

xo,
Yvonne and Lolly


Saturday, August 11, 2012

Kazoos! Make your own with toilet paper rolls.

For the last several months, we've been collecting empty toilet paper and paper towel rolls from friends and family.  Thanks to everyone, we now have hundreds, and you might have noticed in our previous post for Olympic games that we used some as pretend torches.  Well, we still had a ton left, so we decided to create musical instruments.  I was a bit sceptical and not quite sure how well little ones would be at making the sound...but it was a huge success at our latest concert.  We gave everyone a chance to color and construct their very own kazoos to play along with us.  It's a super easy craft and a great way to recycle, too!  


You will need:
  1. Toilet paper roll or paper towel roll sans paper
  2. Rubber band
  3. Wax paper
  4. Scissors
  5. Crayons or stickers to decorate
Directions:
  1. Decorate the toilet paper or paper towel roll
  2. Cut a small hole about 1 inch below the end of the roll.  ( I used one part of a scissor and twisted it to make the hole).
  3. Cut a square piece of wax paper roughly 3.5" x 3.5" and place around the top of the roll (same side with the hole)
  4. Adjust the wax paper so the hole is not covered.
  5. Play!  Hummmm or sing into it!


Saturday, July 28, 2012

Travel Scavenger Hunt

Summertime is a big time for traveling. And, no matter how amazing and fun you destination may be, spending hours in a car, train, or plane can be tough on kids. While trips to the park before and after your journey are great ways to prepare for sitting still for so long, it doesn't change the fact that everyone is about to be buckled into a seat for hours on end. Here is a game that we love to play on our long road trips.
You'll need a plain old notebook, some pens and some crayons or colored pencils. If you're not very confident in your drawing abilities, you can do the same thing by cutting out pictures from magazines or printing up old snapshots. What you need to do for this game is come up with a list of things that you might see on your trip. It can be as simple as a red or blue car, it can be as neat as a river or a bridge, or as exciting as a zebra or a helicopter. The trick with the list is to make it easy in parts so they know that there will always be something they can find, but interesting enough that it'll keep them engaged and curious for hours.
For each item, draw a line so they can mark off how many they find, write out what it is that they're looking for, then draw a picture of it! You can see one of my scavenger hunt lists below. You can assign points for each item, too, if you want to make the game a little more motivating (10 points for a stoplight, 100 points for a helicopter, 5 points for a tractor trailer).
I love this game because it gives kids some control over the trip. It gives them a task, and that can really help make the journey a little more enjoyable. It also helps to make them aware of the world around them. We live in an interesting world filled with fascinating things. Sometimes life is about the journey, not just the destination.
Safe and happy traveling!

Sunday, July 22, 2012

DIY Ribbon Wands and easy ways to play!

Kids love playing with ribbon wands in the Let's Play Today fitness classes that I teach, so I thought you would really enjoy trying these ideas at home or in the classroom! Sometimes we use store bought ones from SSWW, (these wands are great because the ribbon doesn't get tangled around the stick part) - but we also had a lot of fun making our very own, with painters stirring sticks, cray paper (or ribbon), and some stickers,stamps, and crayons. See the video for a closer look!

If you're looking for ones that will last a little longer, visit  the SSWW website where we buy them from.


Here are 3 easy activities to do with ribbon wands:
1. Pretend they're kites and run around the room holding the ribbon wands up high.

2.Go on an adventure and use them as props. Pretend they are lots of silly things, like a horse tail (and gallop around),  a fishing rod (and catch some fish!), an elephant trunk (stomp around while holding it at your noes), a snake (slither it around on the floor), windshield wipers (move back and forth)...endless ideas! 

3. Make shapes or letters - spell out your name or make a circular, zig zag, or figure eight shape (use both the right and left hand to develop proprioception and coordination).